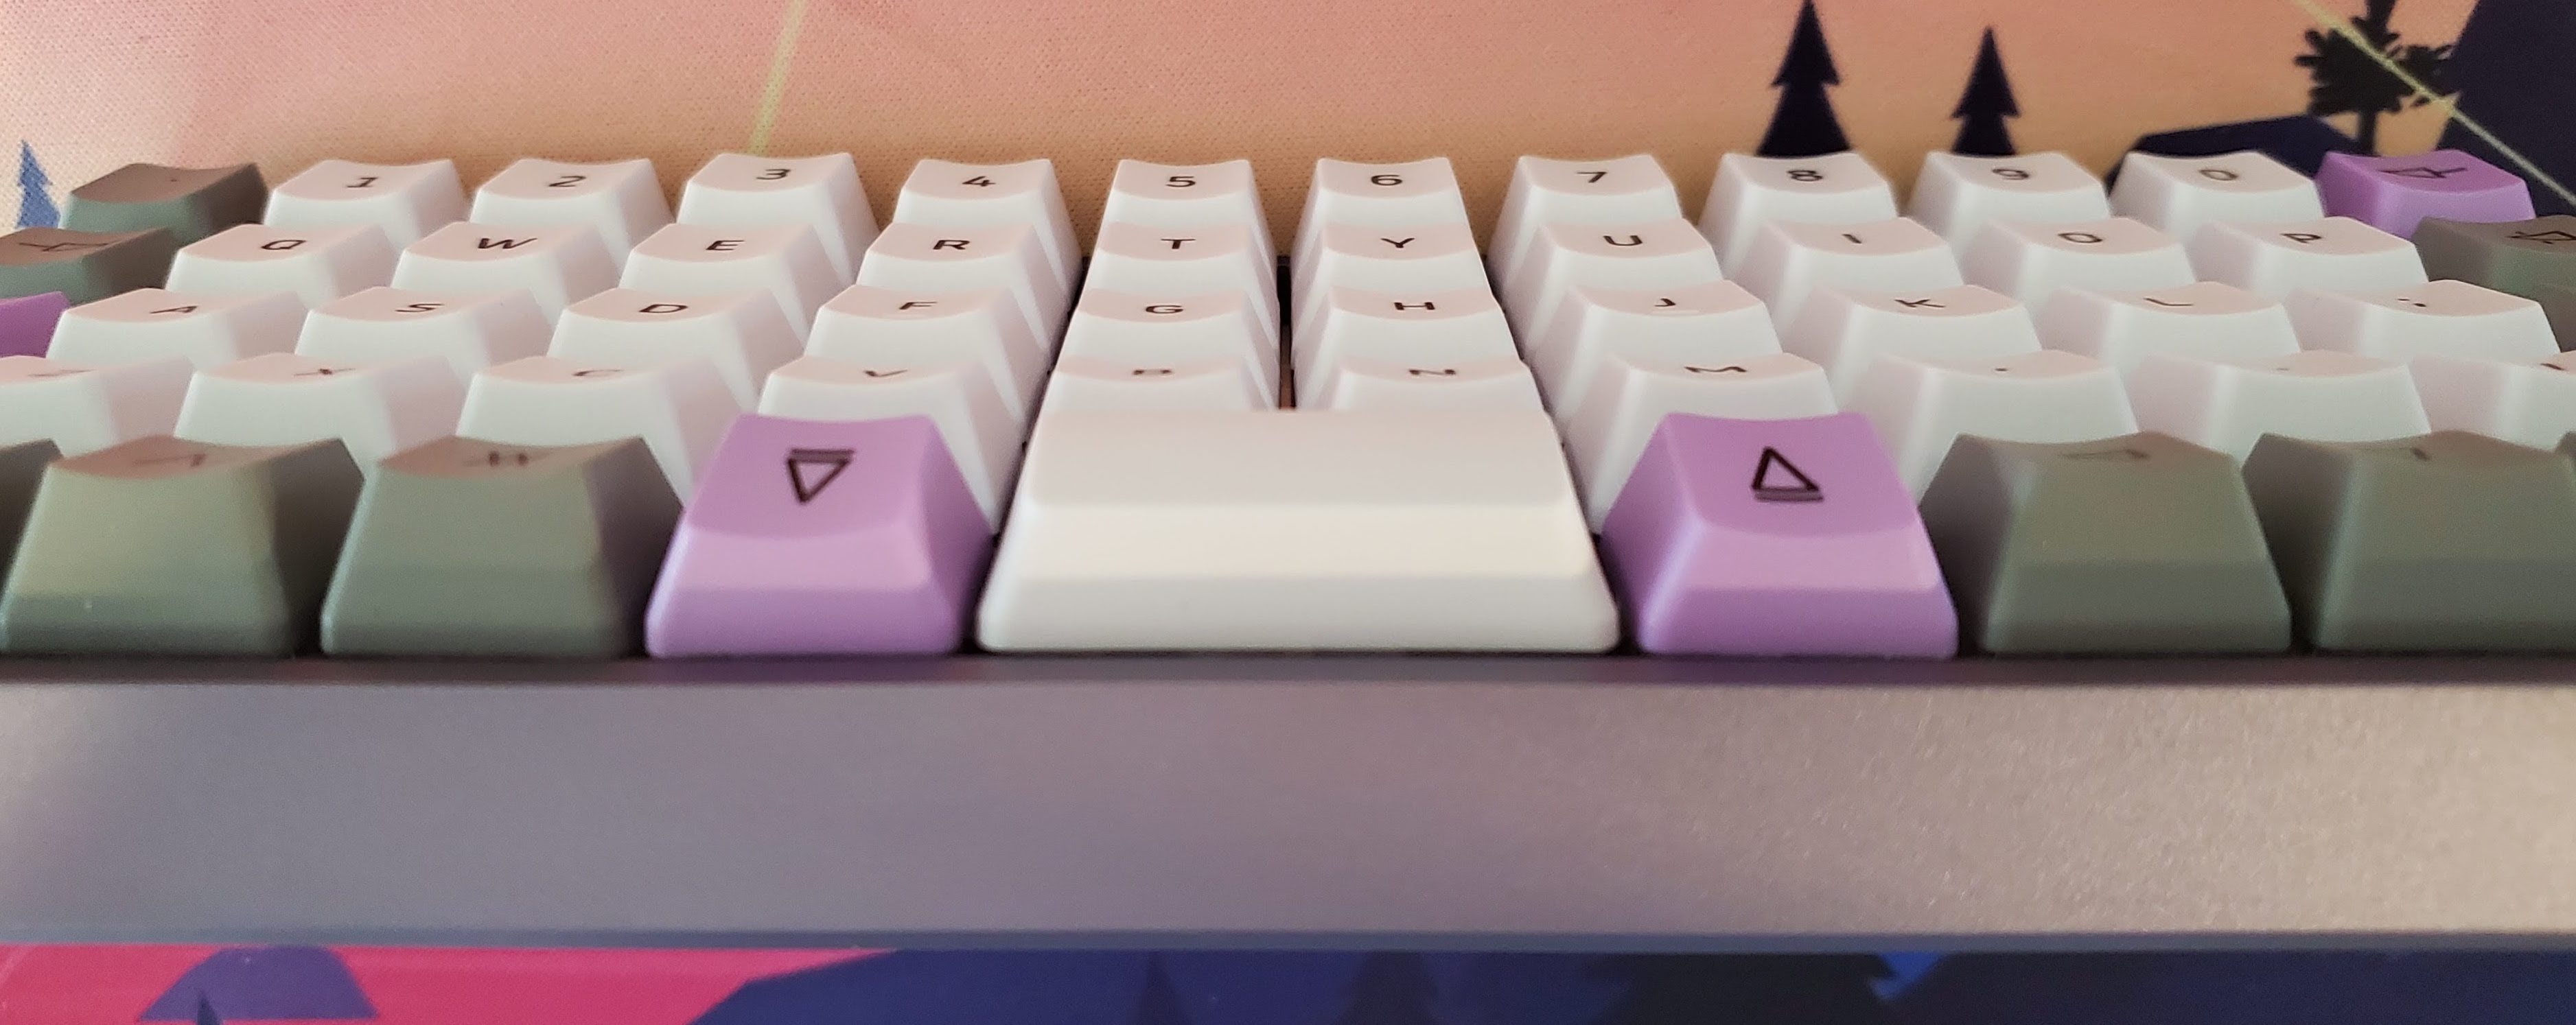
The Drop x OLKB version of the Preonic
Unique functionality is the final piece that brings together a custom mechanical keyboard.
Some keyboards are compatible with a very friendly and quick to use software called VIA. Others require the manual flashing of custom firmware, often shipping with the open source Quantum Mechanical Keyboard Firmware, or QMK.
One such keyboard that does not support VIA is the OLKB Preonic, for which my order came in a few weeks ago and is pictured above. The Preonic is a 50%, ortholinear keyboard which supports a variety of interesting modifications.
After getting used to the basic layout, I wanted to make some changes to the keybindings. This time, I focused on bringing back some keys I miss from larger keyboards by making use of layers.
Layers allow access to extra functionality via holding or pressing a “raise” or “lower” key. It could be easily compared to the on-screen keyboard present on most smart devices, where pressing a virtual key can change the input of all the other keys.
The Preonic does not support VIA (yet) and the QMK Configurator will not allow configuration of a tri-layer setup. So I decided to learn how to compile and flash my own version of the QMK Firmware!
Table of Contents:
- Preface
- Docker
- Forking and Cloning qmk_firmware
- Setting up QMK
- Modifying the Default QMK Firmware
- Compiling New Firmware
- Flashing Firmware
- Conclusion
- Links
Preface
It is possible to develop QMK firmware in Windows, MacOS and Linux.
I tend to prefer Linux for anything develpment related, as there are so few barriers to getting started and accomplishing your goal.
Maintaining my focus on ease of use, having a portable and dedicated development environment would be great too.
This is starting to sound a lot like a Docker image!
With an Ubuntu Docker image, I can perform a clean setup of only what I need to work on QMK.
Docker
I installed Docker via the Docker Desktop installation instructions, even though I would only be working from the command line.
After install, it was as simple as pulling the Ubuntu Docker image with docker pull ubuntu and running it interactively with docker run -it ubuntu.
After updating apt (apt-get update) I installed git, python3, python3-pip and vim. These were going to be necessary for setting up QMK and editing files.
With that done, it was worth exiting the Docker image and committing its new state, in case something went wrong. To do so, I used docker ps -a to get the container’s name and ID after exiting the image. My output can be seen below.

Output of docker ps -a
Either of the NAMES or CONTAINER ID fields can be used to specify the image to commit to. The command looks like docker commit <name> or <UUID> <new_image_name> or in my case, docker commit admiring_gauss ubuntu_for_qmk where ubuntu_for_qmk is what I wanted my new image to be called.
The new image name was then used with any further Docker commands.
In Docker, the user starts out as root. Since the system is contained and effectively backed up, it was probably not worth setting up new user profiles for doing work at this scale.
Thus, I did everything as root, the first thing being cloning a fork of the QMK Firmware.
A good run-down of forking QMK is included in the docs.
Before cloning, I changed into the root user home directory (I’d rather not have my repository in the system root). After forking qmk/qmk_firmware using the browser, I cloned it using the url for my fork of the firmware: git clone <url>.
If, like me, you don’t want to enter your GitHub credentials every time you push or pull, have a look at this Stack Overflow answer. I followed the answer there and ran git config --global credential.helper store and then entered my credentials after the next git pull. After that, git found those credentials for any future commands.
Forking and Cloning qmk_firmware
I used git remote add upstream https://github.com/qmk/qmk_firmware.git to set the official qmk_firmware repo as the remote upstream for my fork, because the docs suggested doing so.
Then I created and checked out a development branch to avoid committing anything to the main branch (git checkout -b <branch_name>).
Setting up QMK
With the GitHub structure in place, I installed QMK via pip, referencing the instructions for Linux install.
I received warnings that /root/.local/bin is not on my PATH after running python3 -m pip install --user qmk. This is a known issue and the docs suggest rectifying this with echo 'PATH="$HOME/.local/bin:$PATH"' >> $HOME/.bashrc && source $HOME/.bashrc.
This worked well for me and the fix persisted after exiting and re-entering my Docker image. After that, running qmk returned the help information as expected (below truncated):
root@456bbd815041:~/qmk_firmware# qmk
usage: qmk [-h] [-V] [-v] [--datetime-fmt DATETIME_FMT] [--log-fmt LOG_FMT] [--log-file-fmt LOG_FILE_FMT] ...
Since I had already forked and cloned the qmk_firmware repository, I should have been able to go straight to testing the build environment.
Until this point, I had not given much thought to running commands as root without the need for sudo.
Since the Linux machine is in Docker, I’d been acting as the root user, with the authority to run commands arbitrarily. But when running qmk setup things didn’t work out.
What was the difference?
A look at the QMK setup scripts revealed that they contain a great deal of shell commands, all led by sudo. This would probably work great on a traditional system, but what if sudo is not installed?
Sure enough, bash returned sudo: command not found. This was easily fixed with apt-get install sudo.
Once that was figured out, qmk setup returned a request for dependencies and, after installing those, ‘QMK [was] ready to go’.

Oh boy, it sure was
It was then time to test the build environment using another command from the QMK docs: qmk compile -kb <keyboard> -km default.
If you’ve made it this far, I assume you have a snazzy custom build in front of you or are preparing a PCB for one.
I was in this to remap my Preonic rev3 so my command was qmk compile -kb preonic/rev3 -km default. This useful list contains all the supported keyboard/version names - find find yours and swap it in the command if you’re following along.
This should result in lots of [OK] rolling by and then a new .bin file of your firmware will exist in your QMK home directory.
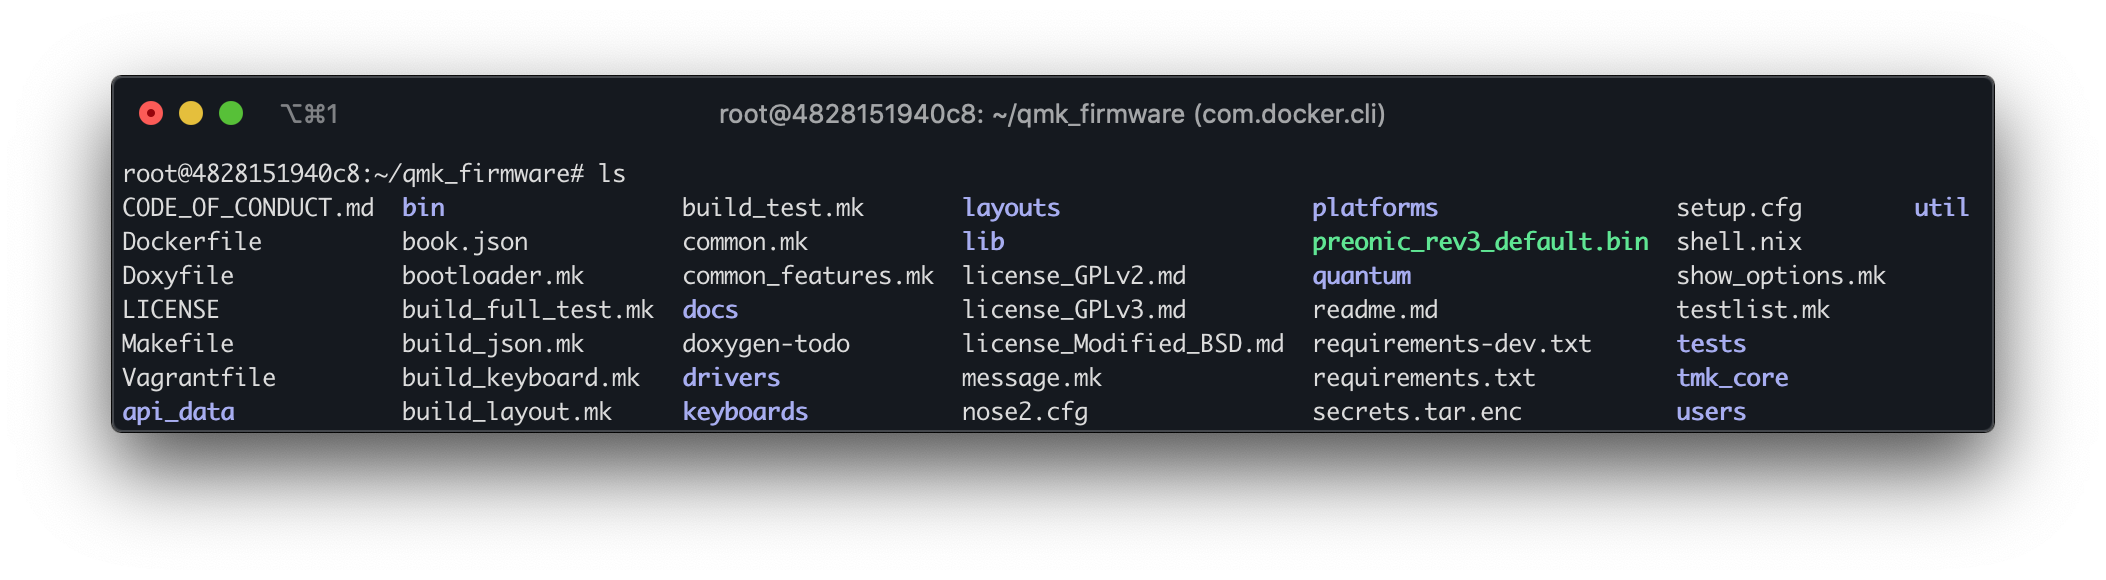
The qmk_firmware home directory after a successful compile
This was another good time to exit and commit the Docker image, because everything so far had been successful.
Before doing so, I went ahead and configured the build environment with defaults because I’ll only be compiling for the Preonic for the foreseeable future.
If you’d like to do the same, the QMK docs outline the process.
Modifying the Default QMK Firmware
It was time to make some modifications! Or, as this part is called in the QMK docs, Create a New Keymap!
If the build environment is setup following the instructions in the docs, a copy of the default keymap should already exist, likely named after your GitHub username. Otherwise, the target keyboard will need to be specified as in qmk new-keymap -kb <keyboard_name>.
To change the layout, I opened keymap.c for editing.
I don’t mind using Vim, so I changed into my user directory with cd qmk_firmware/keyboards/preonic/keymaps/rjennett/ and then opened the file with vi keymap.c.
The keymap file was pretty straightforward, with easy to visualize code structure and visually accurate commenting.
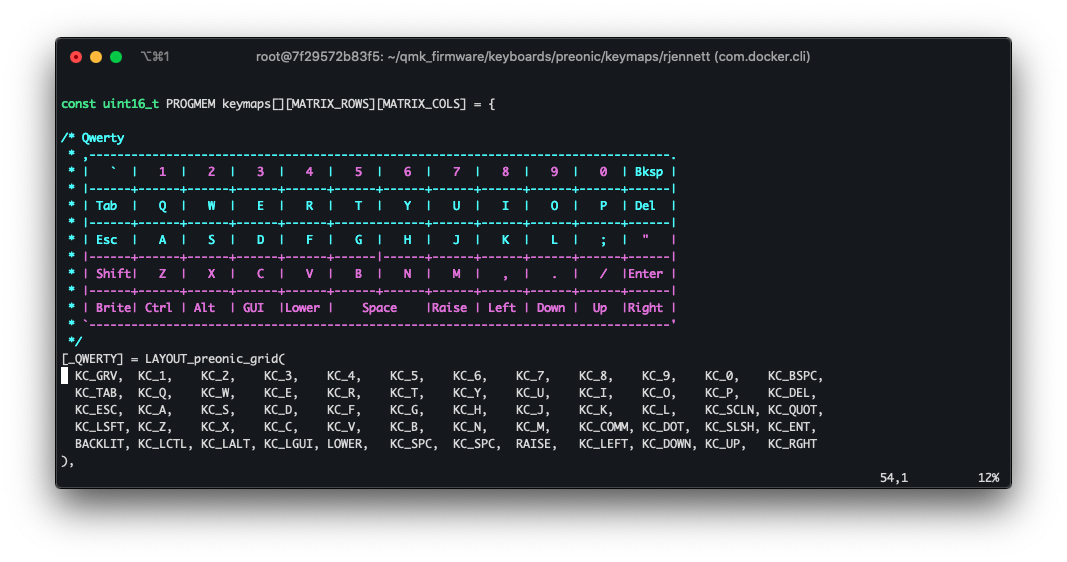
Default Qwerty layout from keymap.c as seen in Vim
There is a lot going on in the firmware itself, which is extensively documented. As far as I was concerned for these modifications, keymap.c contained multiple matrices whose elements corresponded to switches on the keyboard and were populated with keycodes.
My changes this time were focused on the Colemak layer and the lower layer.
I chose to rename the Colemak layer to numpad in all the appropriate places and replace a swath near the center with a typical numpad arrangement. My finished matrix is pictured below.

Modified Colemak layer as numpad layer matrix
The other thing I had begun to miss was caps lock, since it has no mapping in the default Preonic keymap. Escape is normally duplicated on the Qwerty layer as well as the lower layer, so it was a great candidate for remapping.
Not to mention that it would effectively be in the same spot as caps lock would be on a larger keyboard, making the mind-finger link a bit stronger for me.
Below is the finished version of my new lower layer.

Modified lower layer with escape remapped to caps lock
Compiling New Firmware
The command to use next was qmk compile. Using it as such will only work if the default build environment is configured, which I did earlier.
After a couple tries, my new firmware compiled! Very exciting.
Flashing Firmware
Flashing directly from Docker requires some extra set up.
It is not even recommended in the QMK docs on Docker to bother with Docker Machine, so I went with a simpler method.
The following command (which I learned of from Stack Overflow) can be used to copy files from the Docker image to the host machine: docker cp <containerId>:/file/path/within/container /host/path/target.
Once the firmware file was on the host machine, I was able to flash the keyboard.
This required a program called QMK Toolbox, and to put the keyboard into DFU (Device Firmware Upgrade) mode.
The Preonic has a reset button on the bottom of the PCB, easily accessible via the Drop x OLKB version of the case. Other keyboards have their own method of entering DFU.
After selecting my firmware file in the QMK Toolbox dropdown and pressing the reset button on the Preonic, QMK Toolbox recognized the keyboard as below:
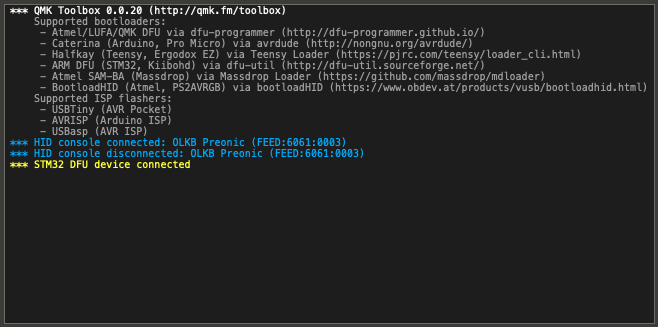
QMK Toolbox response to keyboard entering DFU
And then after flashing, the keyboard reconnected and started:
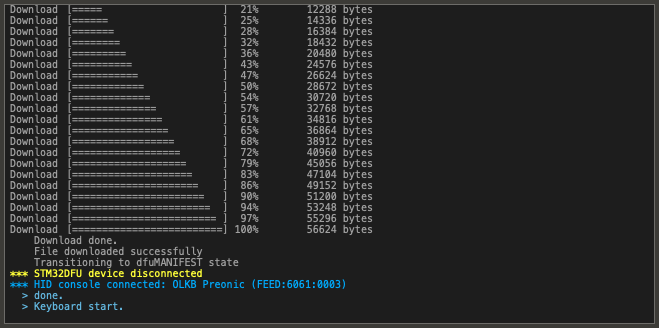
QMK Toolbox successful flashing dialog
Now that the firmware was confirmed to work, I went ahead and pushed my changes to the development branch. I had to follow some extra git instructions, since it was the first commit and push. But for future commits, everything should be set up already.
Conclusion
QMK seemed like a lot to take in at first, but it wasn’t too hard to figure out the basics.
I don’t use the new layouts all the time, but they’re nice to have when I’m looking for them.
More so than these changes, though, I was interested in learning how to modify QMK and get comfortable compiling my own firmware.
For me, things like this add longevity to building keyboards.
Writing my own firmware is a fun new way to interact with a build, other than the building process or trying out new switches or keycaps.
Links
Here are all the links that were sprinkled throughout the post, in order of appearance and without duplicates: